
STIR/SHAKEN Quick Start Guide
Introduction
This document will guide you to:
- Obtain your SHAKEN certificate from Sansay STI-CA.
- Install your SHAKEN key to start signing calls.
If you are deploying STIR/SHAKEN from the beginning please follow this guide in sequence.
STI-PA
After receiving approval from the STI-PA as an authorized Service Provider, you will need to create an API user as the first step to create an account with Sansay STI-CA. If your STI-PA approval is still pending and you are looking for more information on how to answer some of iconectiv questions please use this link instead.
- From the iconectiv STI-PA portal, login as Service Provider and click User Management

- Click Add User:

- Select API as the user role when you are adding the user. Please take note of this user as it will be used during your STI-CA on-boarding steps. This user will retrieve an SPC token from the STI-PA interface which is a required step to obtain a certificate.

STI-CA
If not already, Sansay will proceed to create your account in the Sansay STI-CA portal @ https://sti-ca.sansay.com:4000.
This portal provides tools that facilitate certificate management. Obtaining a certificate via Sansay's CA web portal takes less than five minutes and it is done in three easy steps.
- When the account is created you Sansay will enable access to your list of authorized users. Users will receive an introductory e-mail to reset their passwords as displayed below. We suggest that the following steps (2-6) are only completed by one user.

- Log into Sansay STI-CA portal by clicking on the Reset Password button or link and entering your password. A few seconds after you set your new password you will redirected to the main login page.

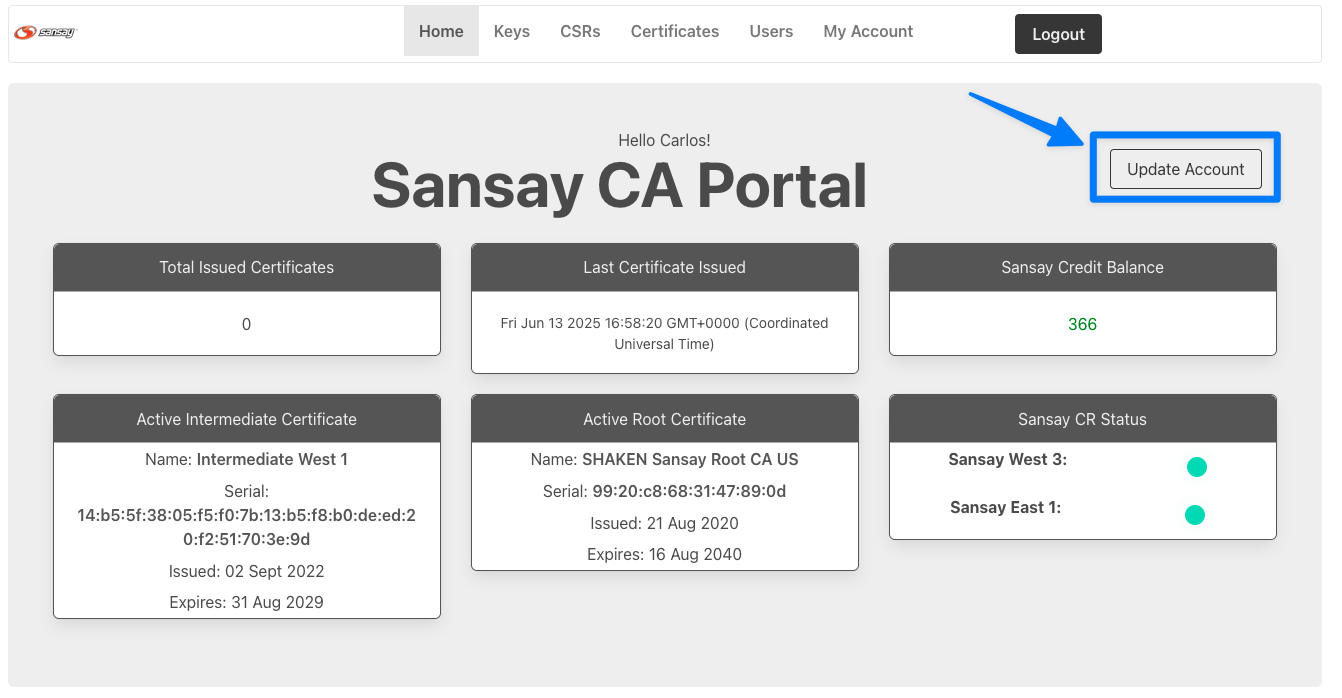
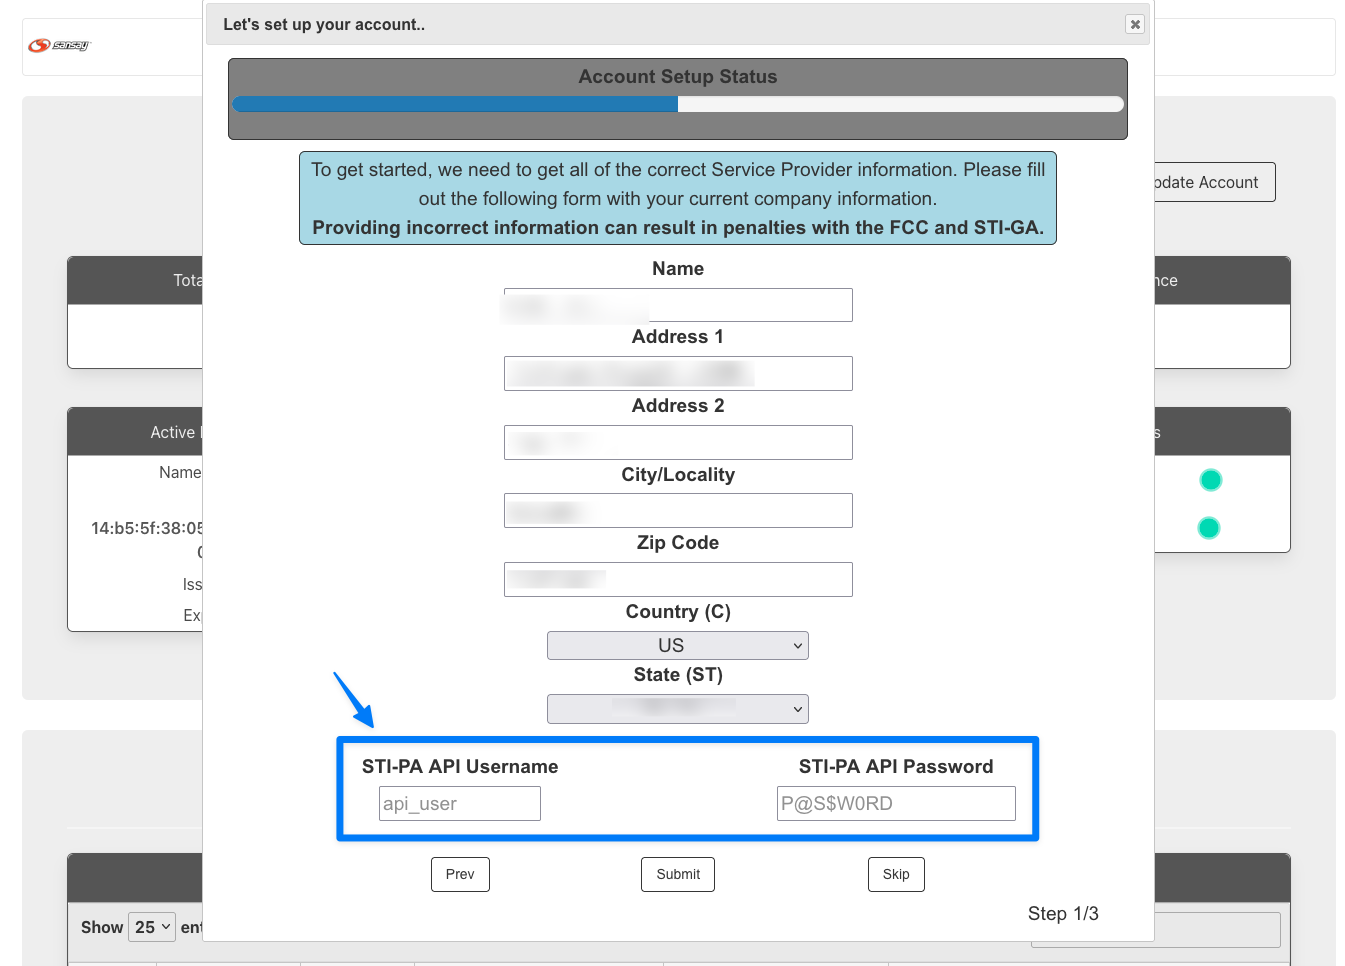
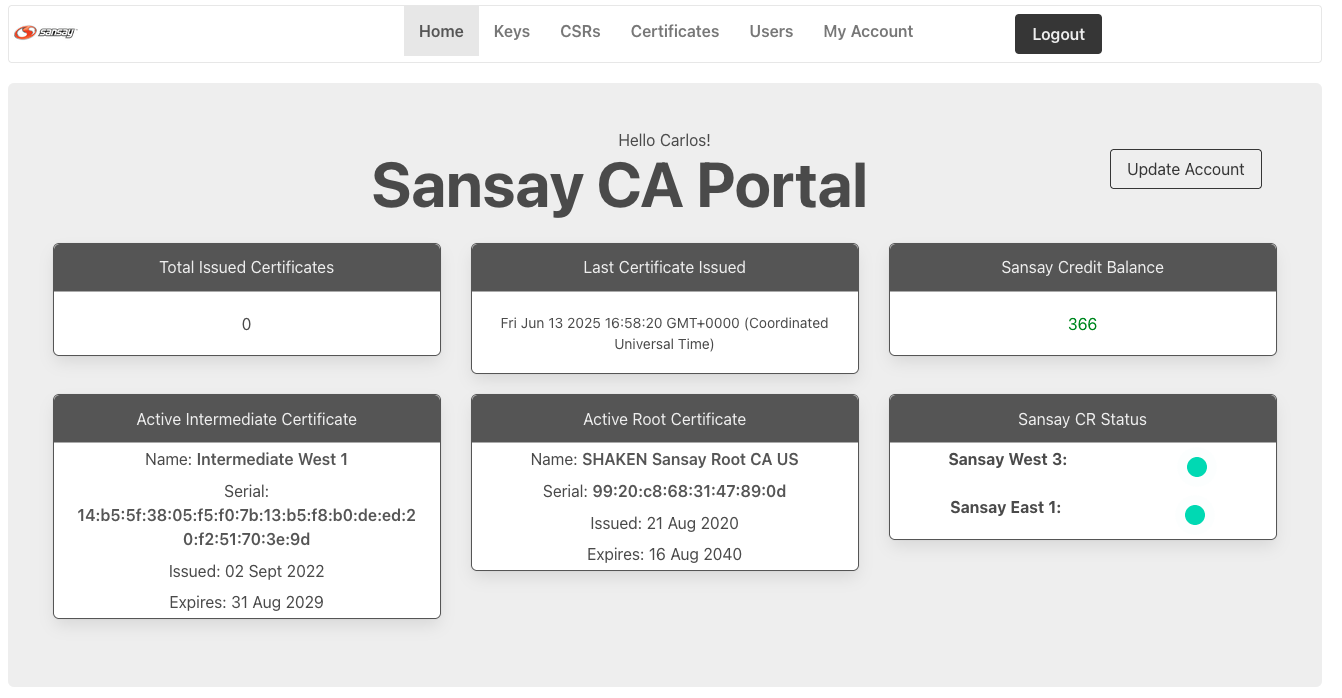
- After successfully login to the portal you will see a welcome page. During initial account setup you will be required to enter the STI-PA API user credentials. If the credentials are invalid a certificate can't be issued. If you don't see the see the initial setup after the login, click "Update Account".
- From the STI-CA portal we will be completing three steps to issue your SHAKEN certificate.
 The steps are as described above:
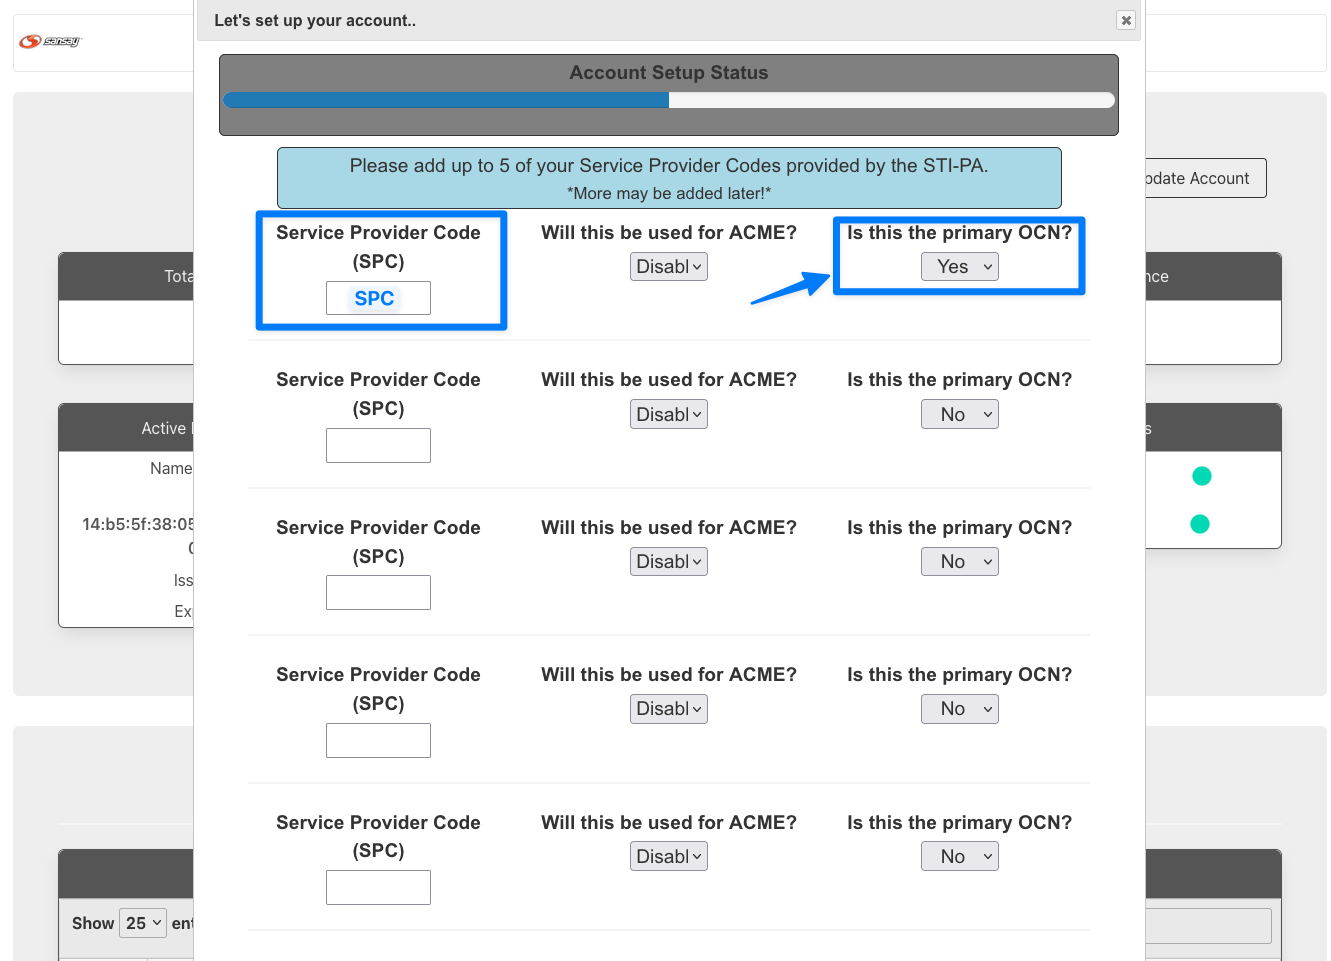
- Generate a private key per SPC code (SPC code is usually linked to your OCN).
- Generate a certificate signature request (CSR).
- Create your certificate.
- Create private key. Browse to Keys (top navigation bar) then click on Add. Select your SPC code (previously loaded by Sansay during account setup) and give your key a memorable name. Immediately after the key is generated your browser will auto-initiate a key download. You will need this key later on.

- Create CSR. Browse to CSRs and click on Add. It is important to associate the CSR with the previously generated key. (You don't need to download the CSR).

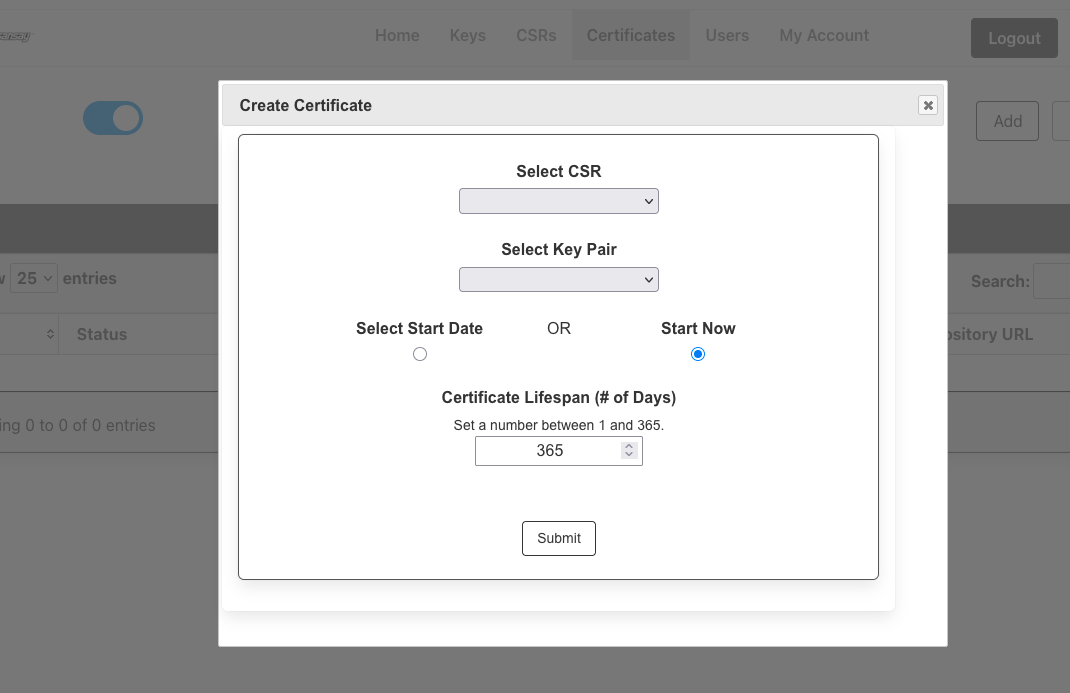
- Generate certificate. Browse to Certificates and click on Add. You will be asked for the following information:
- Key Pair (Private Key) generated in step 4.
- CSR generated in step 5.
- Lifespan: Your choice from 1 to X days. Maximum is 365 days (1 year)
NSS
The next steps are provided for customers using Sansay's NSS solution for call authentication and verification (STI-AS and STI-VS).
Your SBC or SIP proxy/feature server will be able to obtain the SHAKEN signature via REST or SIP protocols. Customers using Sansay cloud NSS can skip steps 1-2.
- Initial NSS setup.
- Signaling IP. Browse to System > Virtual IP. Click on Add.
- This IP address can be the same IP as the management interface or a different IP.

- Define Transport Protocol. Browse to Switches > Service Ports.
- e.g. UDP/5060.

- e.g. UDP/5060.
- Define Switches. Switches will be the devices querying NSS via SIP/REST (e.g. SBC, Feature Server, PBX).

- Import STI key store.
- Private Key. This a PEM file automatically downloaded from the STI-CA portal.
- Signing Algorithm: Always ES256
- ID Header Info: https://+(your STI-CA generated URL).
- Service Provider Code. Your STI-PA SPC code. A key will is need per SPC.
- Alias: A memorable name.
- Passphrase: Blank (almost always).

- Click on the + green button to complete the key import.
- Lastly attach the key to the previously created switches using the pencil icon and hitting submit.
- Define attestation policies. Rules are applied in the following order SbcID, OTG and ANI.
- If specific SbcID is defined it will take the highest priority.
- If specific OTG is defined (with any SbcID) it will take the highest priority.
- If specific ANI (with any SbcID or any OTG) it will take the highest priority.
- Likewise for configurations with SbcID you can use OTG and ANI.

- This IP address can be the same IP as the management interface or a different IP.
VSXi
The next steps are provided for customers using Sansay's VSXi SBC.
- Create an STI-AS App Server.
- Browse to App Servers > STI-AS and click on Add.
- If this is your first time creating an STI-AS the configuration below will do except for replacing the IP/FQDN for your NSS, matching the NSS (or other STI-AS) SIP port, and specifying the egress Service Port to query NSS (or other STI-AS).

- Enable STI-AS on your ingress TIDs/Resources.

- Make sure to enable ID header pass-thru on your egress resources such as a downstream carrier.

To enable STI-VS (call verification) repeat the steps above, except:
- Create STI-VS App Server.
- Browse to App Servers > STI-VS and click on Add.
- If this is your first time creating an STI-VS the configuration below will do except for replacing the IP/FQDN for your NSS, matching the NSS (or other STI-VS) SIP port, and specifying the egress Service Port to query NSS (or other STI-VS).

- Enable STI-VS App Server on a per Trunk ID / Resource basis.
